Accounts
At Composity, every individual you engage with, whether a potential or current customer or a partner, has an account. The Composity CRM module simplifies account management by centralising key client information. You can include various information concerning your clients, contacts, billing information, companies, activities, segments, and messages in the CRM. When setting up an account, you only need to fill in a few essential fields that are important to the account. However, the CRM module’s flexibility allows you to include additional details as your relationship with the client grows.
Account lists
When you create a workspace, you will find that five types of account lists are automatically generated. These include Billing Data, Addresses, Activities, Segments, and Messages. These lists serve as the foundation for your CRM data.
The accounts module allows you to manage your account data directly from within the module. For example, you can add client information directly from the respective module by following these simple steps:
- Click on the "Client" list.
Click on + icon
As you are redirected to the new account form, fill in all the necessary custom fields and save the information.


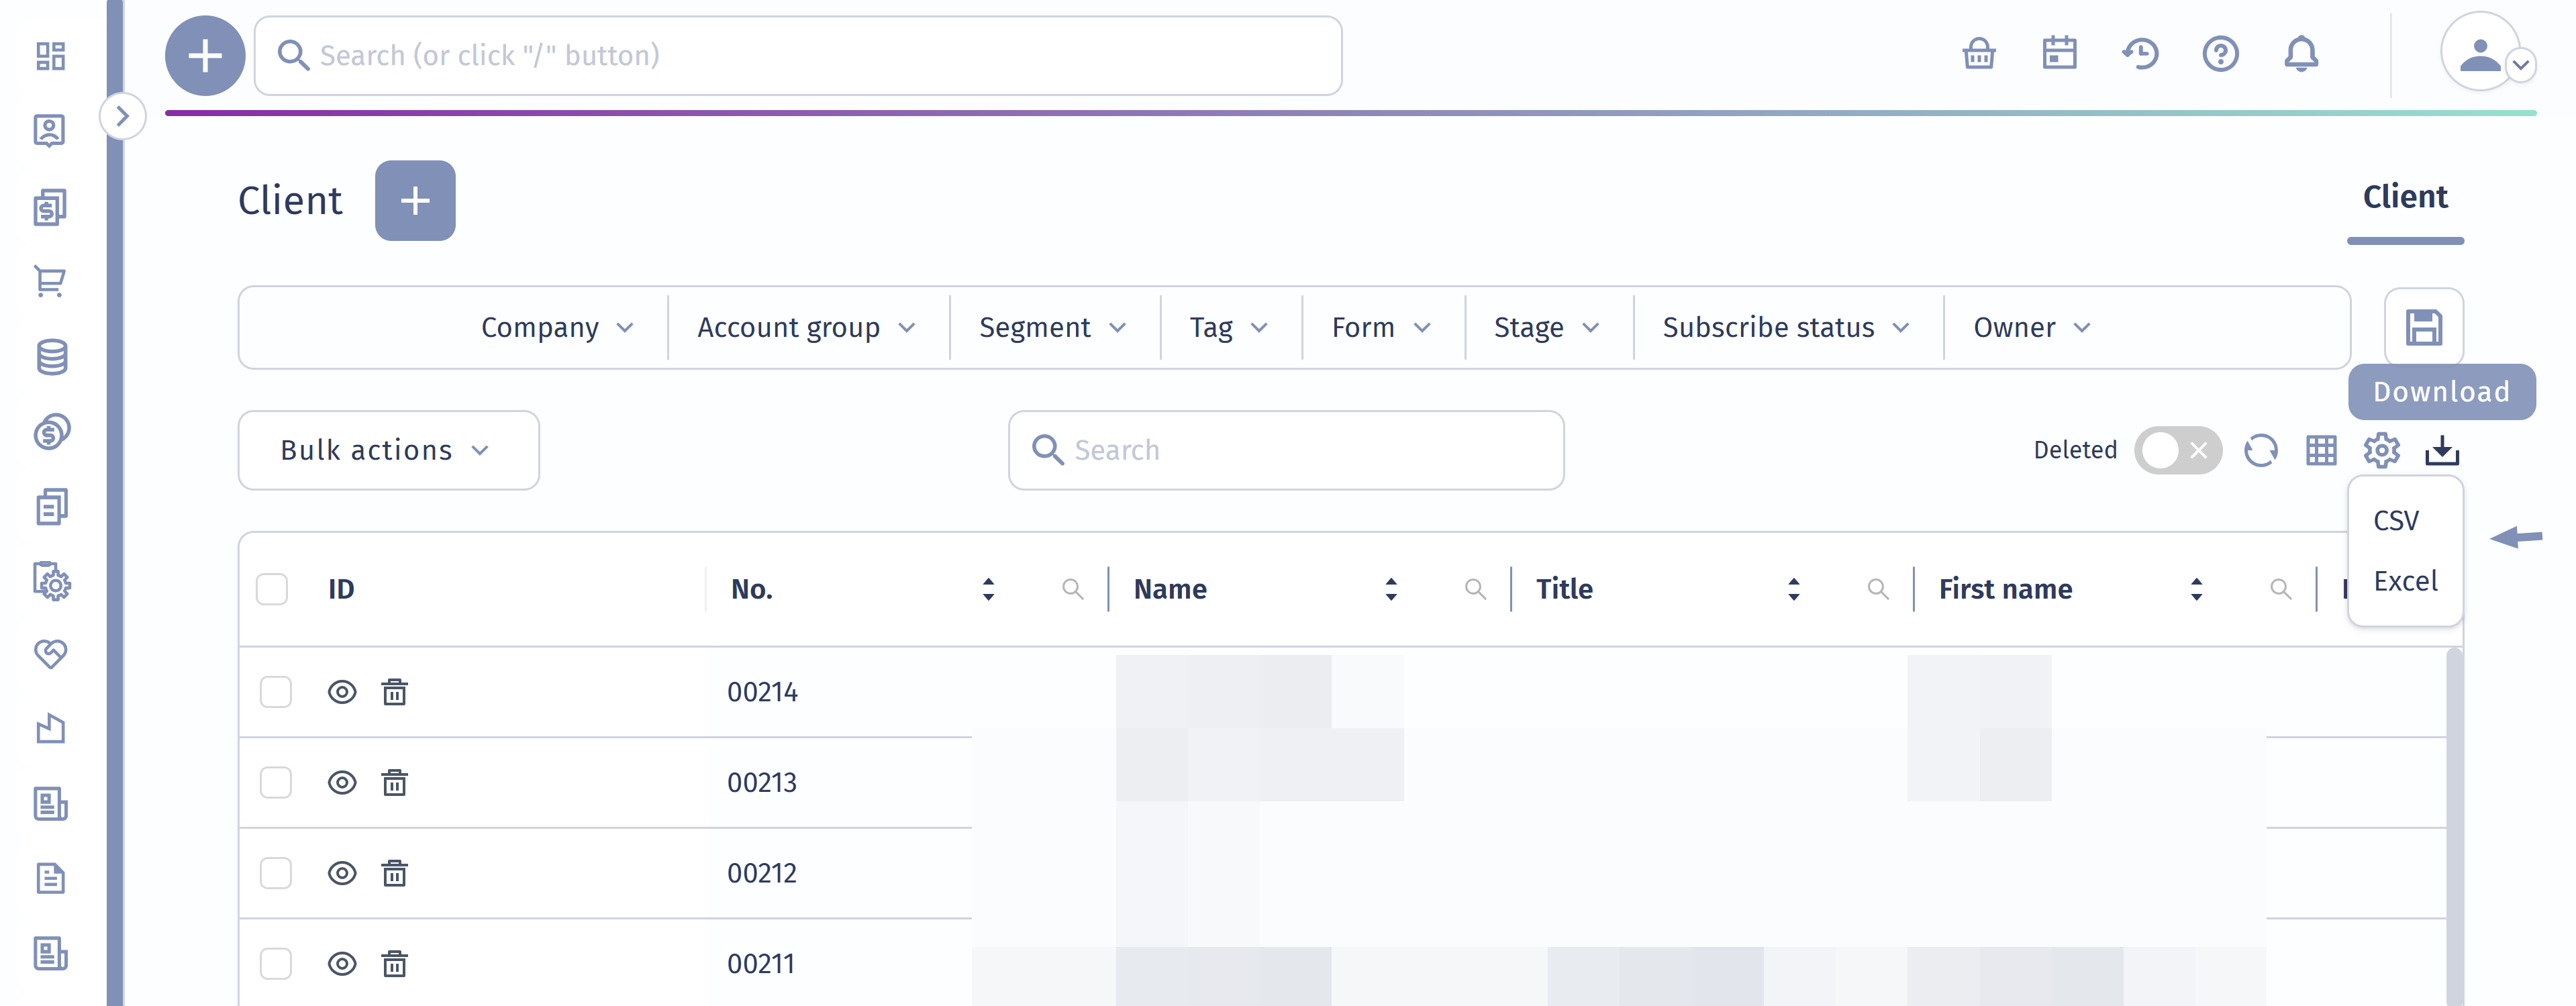
Exporting Account Data
To export your account list, navigate to the menu and click on the download button. You can choose to export your data in either CSV or Excel format.
Importing Account Data
Instead of manually adding accounts one by one, you can import account lists from an existing file. To import data, go to Administration‣Data Import, then select Accounts from the list of options.
Important: Whenimporting data, be sure to use the import template specifically designed for the Accounts module, as the file import columns must match your data structure to ensure a successful import. Create a copy of the import file and make the necessary changes directly within the copied file. Account profiles

After adding new accounts in Composity, you can easily access and manage detailed information about each account, including the account name, contact details, billing information, addresses, and stages.
To view or modify details of the account profile, follow these steps:
- Log In: click on the eye icon to log in to the specified account profile.
- Add or Edit Information: account profiles allow you to modify or add various details, including:
- Rating, Last Contact, and Activities: These sections provide insights into the accounts engagement and interaction history.
- Billing Data: Update billing information to ensure accurate records.
- Tags, Segments, Group, Consent: These fields help categorize and manage the account within your CRM.

Note: The fields visible in the account profile are customizable. Navigate to Settings ‣Form type ‣Account Form Type to activate or deactivate the view fields you want to see in the account profile.
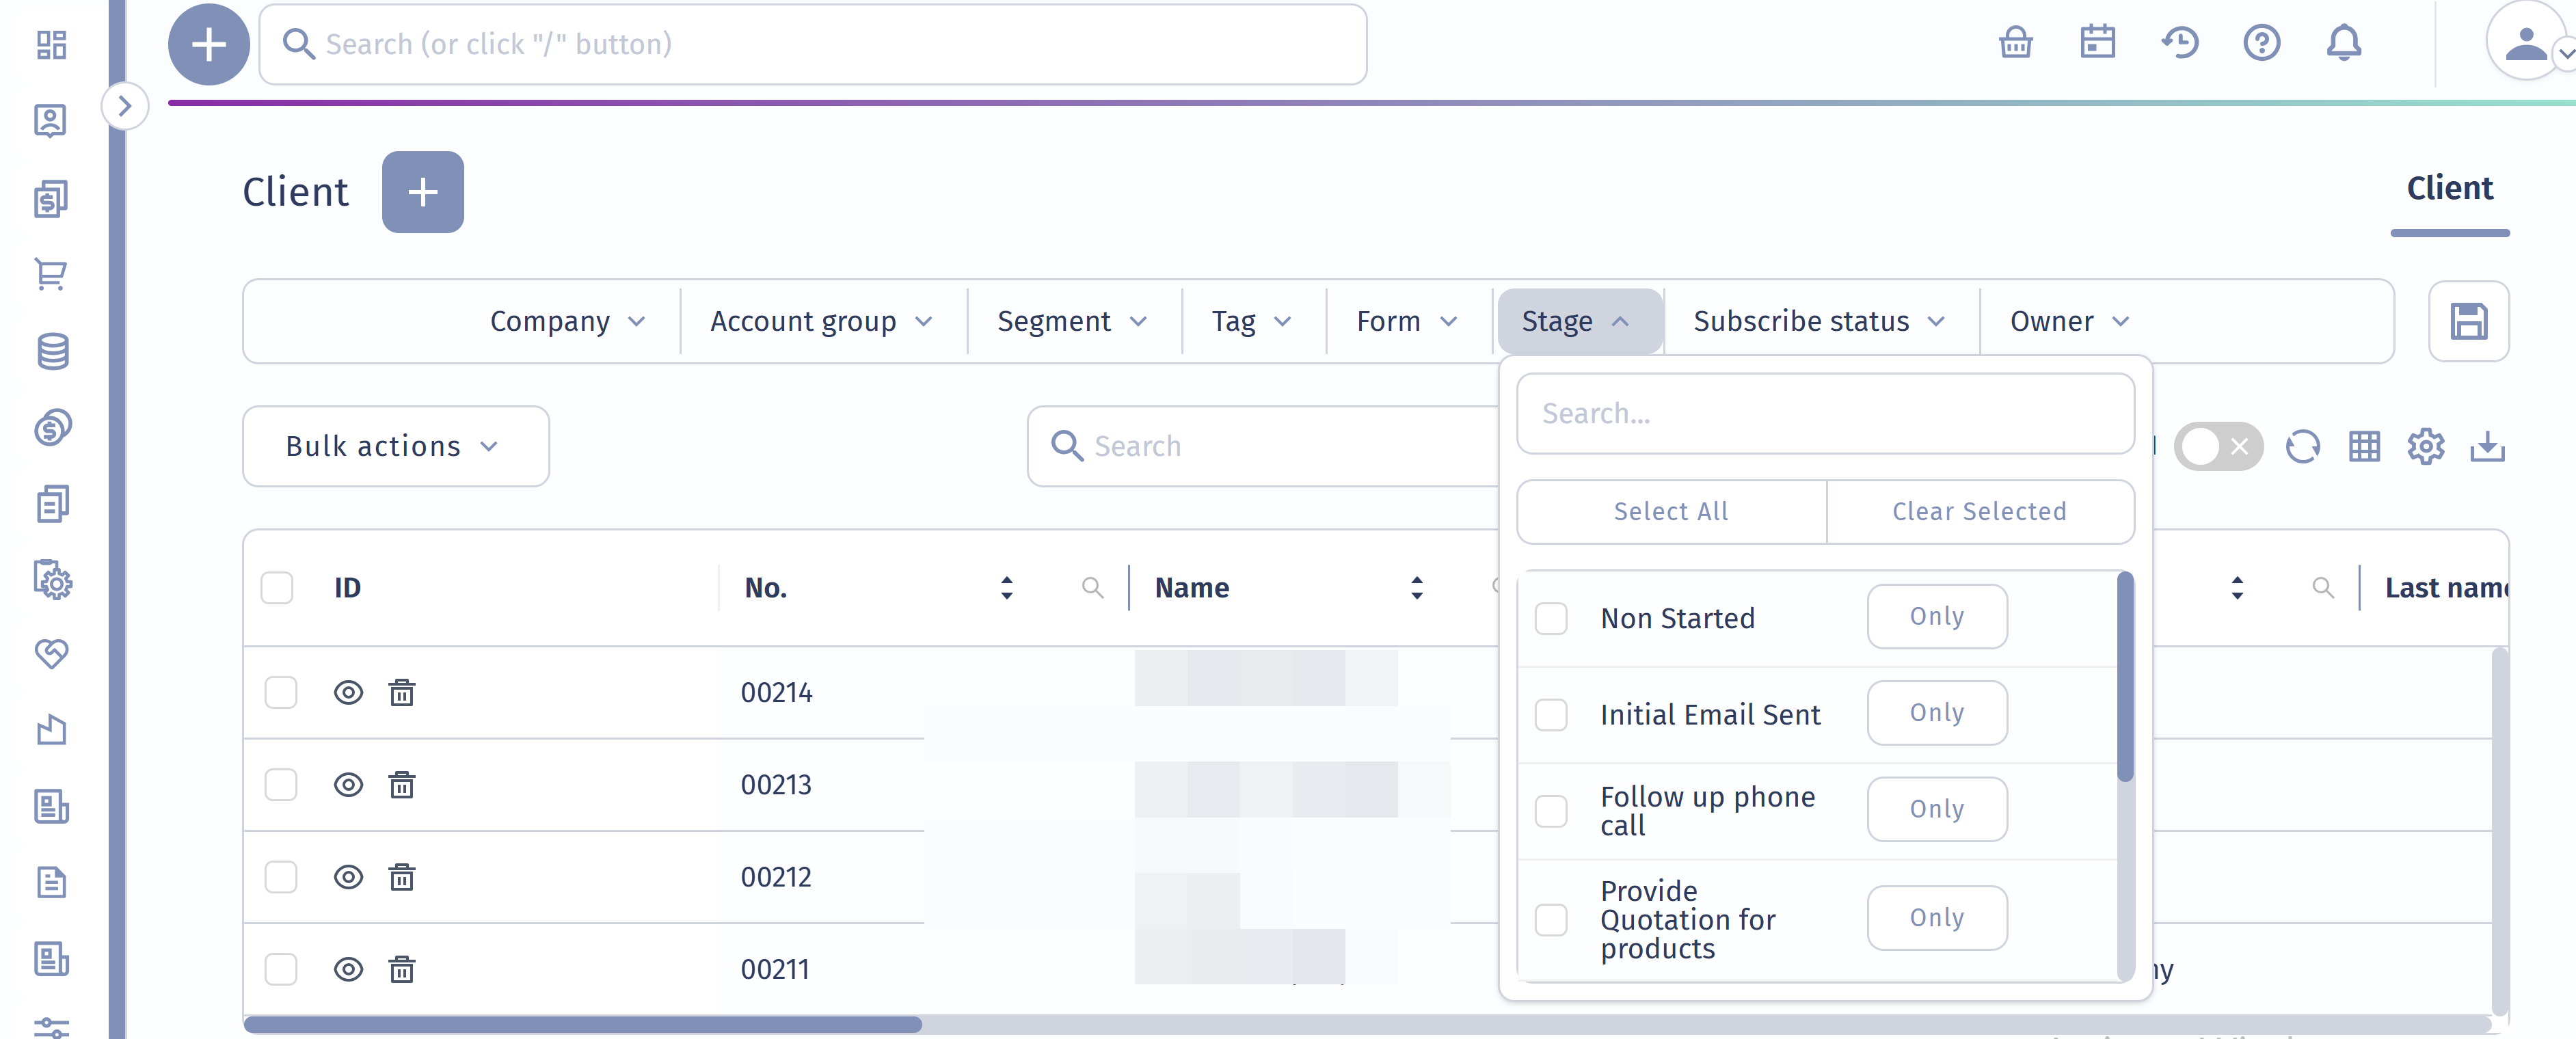
Search and filter
You can refine your view by using the search and filter options available at the top of the account data list. Filter accounts by various criteria such as company name, account group, segment, tags, form type, business stage (like lead or opportunity), and assigned owner, allowing you to efficiently locate and manage specific clients based on these attribute.
Customising your lists:
To make your CRM data even more relevant, you can add specific lists that align with your business needs. This allows you to define Account type. Select Lead, Contacts or Company, depending on the type of contact that is being added.
Here's how to do it:
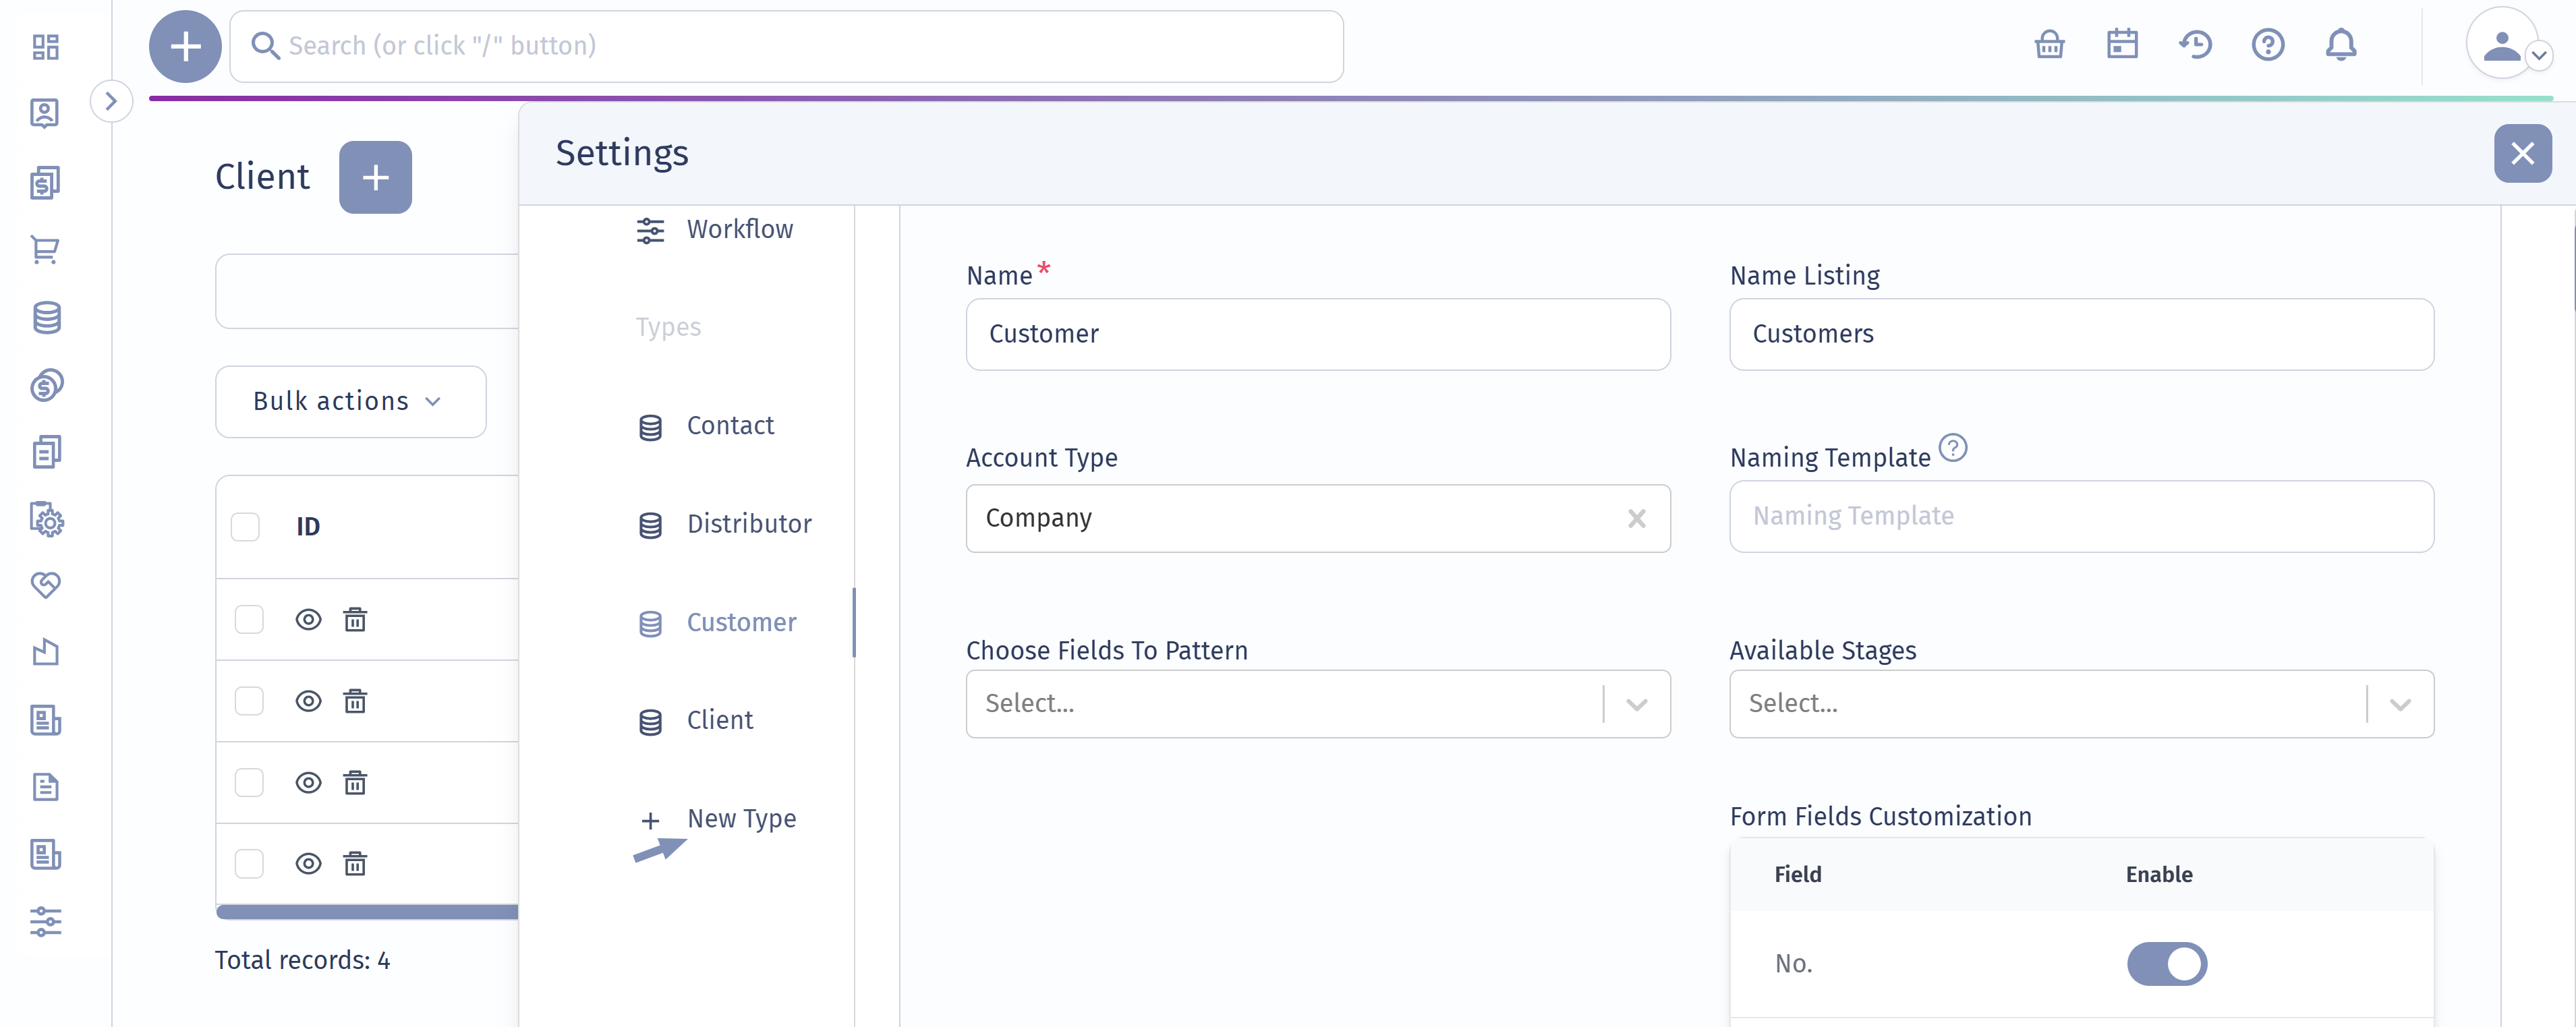
Access form types:
You have two options to add or edit account forms: either access the settings directly from the account grids and select the account type to edit, or click on "New Type."
- Or go to "Settings" and select "Form" types.
- In the "Forms" section, click on the "Open" button to access a grid containing all available forms.
To add a new form to your accounts module, click on the "New" button. From the drop-down menu, select the "Account" form type.

Depending on the business requirements, the form fields and view fields can be activated or deactivated. The activated form fields will be present when adding new information for these specific accounts list.

From here you can setup your Account list by adding the following fields to the form:
Stages
The customization of the Account forms begins with adding stages that define the phase your contact goes through. The field Available Stages is not required. If left blank, the system default stage for the Accounts module will be used. Additionally, you can add stages, which will be available in the drop-down options for the Accounts.
Note: to create stages that correspond to the activities of your Account, go to "Account settings", from here you can access "Document stages and workflow". Click on add a row to add a new stage to the list to which you want to add steps.
Basic Information
Capturing accurate and complete information is essential for managing accounts within the CRM system. Below are the key fields for inputting the account holder's or entity's details:
- Name: Enter the full name of the account holder or entity. This field uniquely identifies the account across the CRM system.
- Title: Choose the appropriate title (e.g., Mr., Ms., Dr.) from the dropdown. This ensures proper and formal addressing in communications.
- First Name, Middle Name, Last Name: Fill out these fields to record the complete name of the individual. This data is vital for personalized communication and accurate record-keeping.
Contact Details
Ensure you provide the necessary contact information for effective communication and outreach:
- Phone: Enter the primary phone number, including the country code. This is crucial for direct communication and can be used for calls or SMS.
- Email: Input the primary email address associated with the account. This is the primary channel for sending updates, invoices, and other important communications.
- Website: Provide the full URL of the company or individual’s website. This can be used for quick reference or to gather additional details about the client.
Company and Position Details
These fields link the contact to their company and role within the organization:
- Company Name: Enter the name of the company linked to the account. This helps in associating the contact with their business entity.
- Department: Specify the department within the company (e.g., Sales, Marketing). This is useful for categorizing contacts by their function within the organization.
- Position: Record the job title or position of the individual. This is important for addressing the contact correctly and understanding their role in the company.
- Account Group: Categorize the account under a specific group (e.g., VIP, Regular). This helps with targeted marketing efforts and effective account management.
- Status: Indicate the current status of the account (e.g., Active, Inactive). This helps in tracking the account’s lifecycle and managing engagements effectively.
Financial Information
- Default Amount Credit: Set the default credit limit for the account. This field is crucial for managing credit risk and ensuring that credit terms align with company policies.
- Ledger Account: Specify the ledger account associated with this client.
- Payment Terms: Define the payment terms (e.g., Net 30 days). This is important for setting clear expectations with the client regarding payment timelines.
- Pricelist: Select the appropriate price list for the account. This field helps in applying the correct pricing structure to all transactions.
Note: You can add a price list under Administration‣Pricing‣Price list.
- Discount Group: Assign the account to a discount group if applicable. This ensures that the correct discounts are applied automatically during sales.
Additional Attributes
- Description: Provide any additional information or notes about the account, including specifics about the client’s preferences, history, or other relevant details.
- Address: Enter the full address of the account, including street, city, and postal code. This is essential for shipping, billing, and other logistical purposes.
- Location: Specify the geographic location of the account, such as city or region. This helps in regional marketing and service allocation.
- Language: Select the preferred language for communication. This ensures that all communications are in the client's preferred language, improving engagement.
- Currency: Choose the currency used for transactions. This ensures that invoices and payments are processed in the correct currency.
- Owner: Assign a specific user or team as the owner of this account. This field is critical for accountability and managing client relationships.
- Billing Data: Input all necessary billing information, such as Company ID, VAT number, and other relevant financial data, to ensure smooth invoicing and financial transactions.
Integrating the Accounts Module
- Sales: the Accounts Module is integrated with sales, allowing you to conveniently record new sales data for clients. When adding new sales, you can search for clients by name in the drop-down menu field, which is populated with data from your accounts list. To record sales specific to a particular account, log into the account profile. Navigate to the "Sales" tab and click on the "+" icon. This action redirects you to a new sales form where you can enter detailed sales information.

Example: If a new sale is made to a client named "ABC Corp," simply select "ABC Corp" from the drop-down list when filling out the sales form. This automatically links the sale to the correct account and ensures that all related financial records are kept in sync.
- Expenses: You can track expense records from companies contained in your accounts list by adding them to the Accounts Module from the Expense tab.
- Payments: By integrating the Accounts Module with Payments, you can manage incoming and outgoing payments linked to your accounts efficiently.
- Projects and Tasks: Linking the Accounts Module with Projects and Tasks enhances project management. Assign accounts to various projects to manage tasks and activities related to those accounts effectively. This integration helps in tracking project expenses and progress.
- Documents: With the Documents tab, you can manage and organize various types of documents associated with each account.
- Upload Public File: Allows you to upload files intended to be accessible by a wider audience within your organization. Public files might include general information or shared resources that need to be available to multiple users or departments.
- Upload Private File: Enables you to upload files that are confidential or intended for specific users only. Private files are restricted to users who have the necessary permissions or roles.
- New Contract: Provides the ability to create and manage new contracts related to the account. Contracts are essential for managing business relationships, setting terms, and formalizing agreements.
Activities to an Account
To record activities or follow-ups for a client or company, click on the eye icon next to the respective record to view details and this will open the account profile.
- From the profile, simply click on the blue plus icon from the activities tab.
A new activity form will appear, allowing you to enter all the necessary details.

The preconfigured activity types for the account are as follows:
- Email: Adds a reminder to the chatter that prompts the person in charge to send an email.
- Reminder: You can add any reminder note or task associated with the account.
- Call: Allows you to schedule time to call the contact or record calls conducted with the account.
- Meeting: Opens a form where you can schedule time to have a meeting with the contact.
- Log time: Tracks time spent on a task or project for the account.
TIP: If you need to set custom reminders for important activities related to accounts, you can do so by adding them from forms-activities.
To add new activity forms go to Settings ‣Form type ‣Activity. Activities with reminders or scheduled meetings will appear in the Notification Center on the dashboard, providing an efficient way to track and follow up on these tasks.